OmniAuth (FREE SELF)
Users can sign in to GitLab by using their credentials from Twitter, GitHub, and other popular services. OmniAuth is the Rack framework that GitLab uses to provide this authentication.
If you configure OmniAuth, users can continue to sign in using other mechanisms, including standard GitLab authentication or LDAP (if configured).
Supported providers
GitLab supports the following OmniAuth providers.
| Provider documentation | OmniAuth provider name |
|---|---|
| AliCloud | alicloud |
| Atlassian Crowd | crowd |
| Atlassian | atlassian_oauth2 |
| Auth0 | auth0 |
| Authentiq | authentiq |
| AWS Cognito | cognito |
| Azure v2 | azure_activedirectory_v2 |
| Azure v1 | azure_oauth2 |
| Bitbucket Cloud | bitbucket |
| CAS | cas3 |
| DingTalk | dingtalk |
facebook |
|
| Generic OAuth 2.0 | oauth2_generic |
| GitHub | github |
| GitLab.com | gitlab |
google_oauth2 |
|
| JWT | jwt |
| Kerberos | kerberos |
| OpenID Connect | openid_connect |
| Salesforce | salesforce |
| SAML | saml |
twitter |
Configure initial settings
Before you configure the OmniAuth provider, configure the settings that are common for all providers.
| Setting | Description | Default value |
|---|---|---|
allow_single_sign_on |
Enables you to list the providers that automatically create a GitLab account. The provider names are available in the OmniAuth provider name column in the supported providers table. | The default is false. If false, users must be created manually, or they can't sign in using OmniAuth. |
auto_link_ldap_user |
If enabled, creates an LDAP identity in GitLab for users that are created through an OmniAuth provider. You can enable this setting if you have the LDAP (ActiveDirectory) integration enabled. Requires the uid of the user to be the same in both LDAP and the OmniAuth provider. |
The default is false. |
block_auto_created_users |
If enabled, blocks users that are automatically created from signing in until they are approved by an administrator. | The default is true. If you set the value to false, make sure you only define providers for allow_single_sign_on that you can control, like SAML, Crowd, or Google. Otherwise, any user on the internet can sign in to GitLab without an administrator's approval. |
To change these settings:
-
For Omnibus package
-
Open the configuration file:
sudo editor /etc/gitlab/gitlab.rb -
Update the following section:
# CAUTION!
# This allows users to sign in without having a user account first. Define the allowed providers
# using an array, for example, ["saml", "twitter"], or as true/false to allow all providers or none.
# User accounts will be created automatically when authentication was successful.
gitlab_rails['omniauth_allow_single_sign_on'] = ['saml', 'twitter']
gitlab_rails['omniauth_auto_link_ldap_user'] = true
gitlab_rails['omniauth_block_auto_created_users'] = true
-
-
For installations from source
-
Open the configuration file:
cd /home/git/gitlab sudo -u git -H editor config/gitlab.yml -
Update the following section:
## OmniAuth settings
omniauth:
  # Allow sign-in by using Twitter, Google, etc. using OmniAuth providers
  # Versions prior to 11.4 require this to be set to true
  # enabled: true

  # CAUTION!
  # This allows users to sign in without having a user account first. Define the allowed providers
  # using an array, for example, ["saml", "twitter"], or as true/false to allow all providers or none.
  # User accounts will be created automatically when authentication was successful.
  allow_single_sign_on: ["saml", "twitter"]

  auto_link_ldap_user: true

  # Locks down those users until they have been cleared by the admin (default: true).
  block_auto_created_users: true
-
After configuring these settings, you can configure your chosen provider.
Passwords for users created via OmniAuth
The Generated passwords for users created through integrated authentication guide provides an overview about how GitLab generates and sets passwords for users created with OmniAuth.
Enable OmniAuth for an existing user
If you're an existing user, after your GitLab account is created, you can activate an OmniAuth provider. For example, if you originally signed in with LDAP, you can enable an OmniAuth provider like Twitter.
- Sign in to GitLab with your GitLab credentials, LDAP, or another OmniAuth provider.
- On the top bar, in the top right corner, select your avatar.
- Select Edit profile.
- On the left sidebar, select Account.
- In the Connected Accounts section, select the OmniAuth provider, such as Twitter.
- You are redirected to the provider. After you authorize GitLab, you are redirected back to GitLab.
You can now use your chosen OmniAuth provider to sign in to GitLab.
Enable or disable sign-in with an OmniAuth provider without disabling import sources
Administrators can enable or disable sign-in for some OmniAuth providers.
NOTE:
By default, sign-in is enabled for all the OAuth providers configured in config/gitlab.yml.
To enable or disable an OmniAuth provider:
- On the top bar, select Menu > Admin.
- On the left sidebar, select Settings.
- Expand Sign-in restrictions.
- In the Enabled OAuth authentication sources section, select or clear the checkbox for each provider you want to enable or disable.
Disable OmniAuth
OmniAuth is enabled by default. However, OmniAuth only works if providers are configured and enabled.
If OmniAuth providers are causing problems even when individually disabled, you can disable the entire OmniAuth subsystem by modifying the configuration file:
-
For Omnibus installations
gitlab_rails['omniauth_enabled'] = false -
For installations from source
omniauth:
  enabled: false
Link existing users to OmniAuth users
Introduced in GitLab 13.4.
You can automatically link OmniAuth users with existing GitLab users if their email addresses match.
The following example enables automatic linking for the OpenID Connect provider and the Twitter OAuth provider.
-
For Omnibus installations
gitlab_rails['omniauth_auto_link_user'] = ["openid_connect", "twitter"] -
For installations from source
omniauth:
  auto_link_user: ["openid_connect", "twitter"]
This method of enabling automatic linking works for all providers except SAML. To enable automatic linking for SAML, see the SAML setup instructions.
Create an external providers list
You can define a list of external OmniAuth providers. Users who create accounts or sign in to GitLab through the listed providers do not get access to internal projects.
To define the external providers list, use the full name of the provider,
for example, google_oauth2 for Google. For provider names, see the
OmniAuth provider name column in the supported providers table.
NOTE: If you remove an OmniAuth provider from the external providers list, you must manually update the users that use this sign-in method so their accounts are upgraded to full internal accounts.
-
For Omnibus installations
gitlab_rails['omniauth_external_providers'] = ['twitter', 'google_oauth2'] -
For installations from source
omniauth:
  external_providers: ['twitter', 'google_oauth2']
Use a custom OmniAuth provider
NOTE: The following information only applies to installations from source.
If you have to integrate with an authentication solution other than the OmniAuth providers included with GitLab, you can use a custom OmniAuth provider.
These steps are general. Read the OmniAuth provider's documentation for the exact implementation details.
-
Stop GitLab:
sudo service gitlab stop -
Add the gem to your
Gemfile:gem "omniauth-your-auth-provider" -
Install the new OmniAuth provider gem:
sudo -u git -H bundle install --without development test mysql --path vendor/bundle --no-deploymentThese commands are the same as the commands for installing gems during initial installation, with
--path vendor/bundle --no-deploymentinstead of--deployment. -
Start GitLab:
sudo service gitlab start
Custom OmniAuth provider examples
If you have successfully set up a provider that is not already integrated with GitLab, let us know.
We can't officially support every possible authentication mechanism available, but we'd like to at least help those with specific needs.
Keep OmniAuth user profiles up to date
You can enable profile syncing from selected OmniAuth providers. You can sync all or specific user information.
When authenticating using LDAP, the user's name and email are always synced.
-
For Omnibus installations
gitlab_rails['omniauth_sync_profile_from_provider'] = ['twitter', 'google_oauth2'] gitlab_rails['omniauth_sync_profile_attributes'] = ['name', 'email', 'location'] -
For installations from source
omniauth:
  sync_profile_from_provider: ['twitter', 'google_oauth2']
  sync_profile_attributes: ['email', 'location']
Bypass two-factor authentication
Introduced in GitLab 12.3.
With certain OmniAuth providers, users can sign in without using two-factor authentication.
To bypass two-factor authentication, you can either:
- Define the allowed providers using an array (for example,
['twitter', 'google_oauth2']). - Specify
trueto allow all providers, orfalseto allow none.
This option should be configured only for providers that already have
two-factor authentication. The default is false.
This configuration doesn't apply to SAML.
-
For Omnibus package
gitlab_rails['omniauth_allow_bypass_two_factor'] = ['twitter', 'google_oauth2'] -
For installations from source
omniauth:
  allow_bypass_two_factor: ['twitter', 'google_oauth2']
Sign in with a provider automatically
You can add the auto_sign_in_with_provider setting to your GitLab
configuration to redirect login requests to your OmniAuth provider for
authentication. This removes the need to select the provider before signing in.
For example, to enable automatic sign-in for the Azure v2 integration:
-
For Omnibus package
gitlab_rails['omniauth_auto_sign_in_with_provider'] = 'azure_activedirectory_v2' -
For installations from source
omniauth:
  auto_sign_in_with_provider: azure_activedirectory_v2
Keep in mind that every sign-in attempt is redirected to the OmniAuth provider, so you can't sign in using local credentials. Ensure at least one of the OmniAuth users is an administrator.
You can also bypass automatic sign-in by browsing to
https://gitlab.example.com/users/sign_in?auto_sign_in=false.
Use a custom OmniAuth provider icon
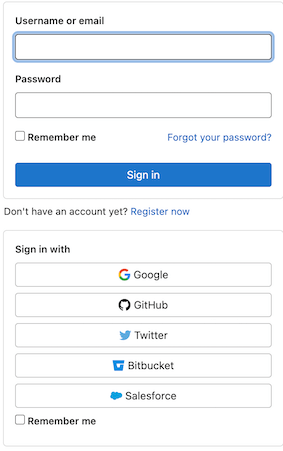
Most supported providers include a built-in icon for the rendered sign-in button.
To use your own icon, ensure your image is optimized for rendering at 64 x 64 pixels, then override the icon in one of two ways:
-
Provide a custom image path:
- If you are hosting the image outside of your GitLab server domain, ensure your content security policies are configured to allow access to the image file.
- Depending on your method of installing GitLab, add a custom
iconparameter to your GitLab configuration file. Read OpenID Connect OmniAuth provider for an example for the OpenID Connect provider.
-
Embed an image directly in a configuration file: This example creates a Base64-encoded version of your image you can serve through a Data URL:
-
Encode your image file with a GNU
base64command (such asbase64 -w 0 <logo.png>) which returns a single-line<base64-data>string. -
Add the Base64-encoded data to a custom
iconparameter in your GitLab configuration file:omniauth: providers: - { name: '...' icon: 'data:image/png;base64,<base64-data>' ... }
-
Limitations
Most supported OmniAuth providers don't support Git over HTTP password authentication. The only exception is Atlassian Crowd (since GitLab 13.7). As a workaround, you can authenticate using a personal access token.