Web IDE (FREE)
The Web Integrated Development Environment (IDE) editor streamlines the process to contribute changes to your projects, by providing an advanced editor with commit staging.
Open the Web IDE
Use the . keyboard shortcut to open the Web IDE. You can also open the Web IDE when viewing a file, from the repository file list, and from merge requests:
-
When viewing a file, or the repository file list -
- In the upper right corner of the page, select Open in Web IDE if it is visible.
- If Open in Web IDE is not visible:
- Select the (angle-down) next to Edit or Gitpod, depending on your configuration.
- Select Open in Web IDE from the list to display it as the editing option.
- Select Open in Web IDE to open the editor.
-
When viewing a merge request -
- Go to your merge request, and select the Overview tab.
- Scroll to the widgets section, after the merge request description.
- Select Open in Web IDE if it is visible.
- If Open in Web IDE is not visible:
- Select the (angle-down) next to Open in Gitpod.
- Select Open in Web IDE from the list to display it as the editing option.
- Select Open in Web IDE to open the editor.
File finder
The file finder allows you to quickly open files in the current branch by searching for fragments of the file path. The file finder is launched using the keyboard shortcut Command+p, Control+p, or t (when editor is not in focus). Type the filename or file path fragments to start seeing results.
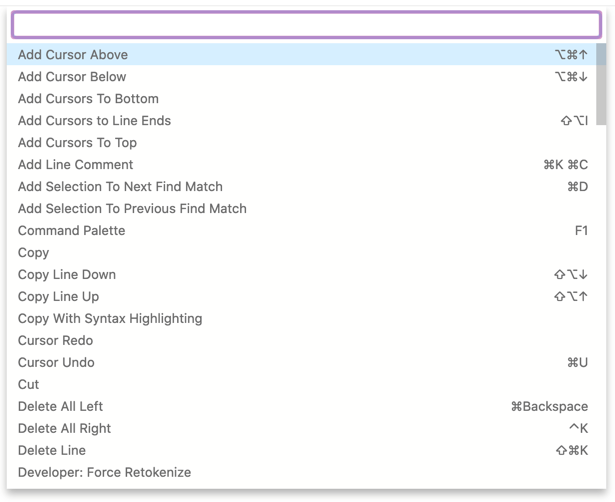
Command palette
You can see all available commands for manipulating editor content by pressing the F1 key when the editor is in focus. After that, the editor displays a complete list of available commands for manipulating editor content. The editor supports commands for multi-cursor editing, code block folding, commenting, searching and replacing, navigating editor warnings and suggestions, and more.
Some commands have a keyboard shortcut assigned to them. The command palette displays this shortcut next to each command. You can use this shortcut to invoke the command without having to select it in the command palette.
Syntax highlighting
As expected from an IDE, syntax highlighting for many languages in the Web IDE makes your direct editing even easier.
The Web IDE currently provides:
- Basic syntax colorization for a variety of programming, scripting and markup languages such as XML, PHP, C#, C++, Markdown, Java, VB, Batch, Python, Ruby, and Objective-C.
- IntelliSense and validation support (displaying errors and warnings, providing smart completions, formatting, and outlining) for some languages. For example: TypeScript, JavaScript, CSS, LESS, SCSS, JSON, and HTML.
Because the Web IDE is based on the Monaco Editor, you can find a more complete list of supported languages in the Monaco languages repository. Under the hood, Monaco uses the Monarch library for syntax highlighting.
If you are missing Syntax Highlighting support for any language, we prepared a short guide on how to add support for a missing language Syntax Highlighting.
Themes
- Introduced in GitLab 13.0.
- Full Solarized Dark Theme introduced in GitLab 13.1.
- Full Solarized Light and Monokai Themes introduced in GitLab 13.6.
All the themes GitLab supports for syntax highlighting are applied to the Web IDE's entire screen. You can pick a theme from your profile preferences.
| Solarized Dark Theme | Dark Theme |
|---|---|
 |
 |
Highlight lines
WebIDE is built with the Web Editor. This enables WebIDE to share the same core features for highlighting and linking to particular lines in the edited files described for the Web Editor.
Schema based validation
Introduced validation based on predefined schemas in GitLab 13.2 with a flag named
schema_linting. Disabled by default.
FLAG:
On self-managed GitLab, by default this feature is not available. To make it available for your entire instance, ask an administrator to enable the feature flag named schema_linting.
This feature cannot be enabled or disabled per-project.
On GitLab.com, this feature is available.
You should not use this feature for production environments.
The Web IDE provides validation support for certain JSON and YAML files using schemas based on the JSON Schema Store.
Predefined schemas
The Web IDE has validation for certain files built in. This feature is only supported for
the *.gitlab-ci.yml files.
Custom schemas (PREMIUM)
Introduced in GitLab 13.4.
The Web IDE also allows you to define custom schemas for certain JSON/YAML files in your project.
You can do so by defining a schemas entry in the .gitlab/.gitlab-webide.yml file inside the
repository's root. Here is an example configuration:
schemas:
  - uri: https://json.schemastore.org/package
    match:
      - package.json
  - uri: https://somewebsite.com/first/raw/url
    match:
      - data/release_posts/unreleased/*.{yml,yaml}
  - uri: https://somewebsite.com/second/raw/url
    match:
      - "*.meta.json"
Each schema entry supports two properties:
-
uri: please provide an absolute URL for the schema definition file here. The schema from this URL is loaded when a matching file is open. -
match: a list of matching paths or glob expressions. If a schema matches a particular path pattern, it is applied to that file. Please enclose the pattern in quotes if it begins with an asterisk (*), it's be applied to that file. If a pattern begins with an asterisk (*), enclose it in quotation marks. Otherwise, the configuration file is not valid YAML.
Configure the Web IDE
Introduced in GitLab 13.1.
The Web IDE supports configuration of certain editor settings by using
.editorconfig files. When opening a file, the
Web IDE looks for a file named .editorconfig in the current directory
and all parent directories. If a configuration file is found and has settings
that match the file's path, these settings are enforced on the opened file.
The Web IDE currently supports the following .editorconfig settings:
indent_styleindent_sizeend_of_linetrim_trailing_whitespacetab_widthinsert_final_newline
Commit changes
After making your changes, select Commit on the bottom-left to review the list of changed files.
After you have finalized your changes, you can add a commit message, commit the changes and directly create a merge request. In case you don't have write access to the selected branch, you see a warning, but can still create a new branch and start a merge request.
To discard a change in a particular file, select Discard changes on that file in the changes tab. To discard all the changes, select the trash icon on the top-right corner of the changes sidebar.

Reviewing changes
Before you commit your changes, you can compare them with the previous commit by switching to the review mode or selecting the file from the list of changes.
An additional review mode is available when you open a merge request, which shows you a preview of the merge request diff if you commit your changes.
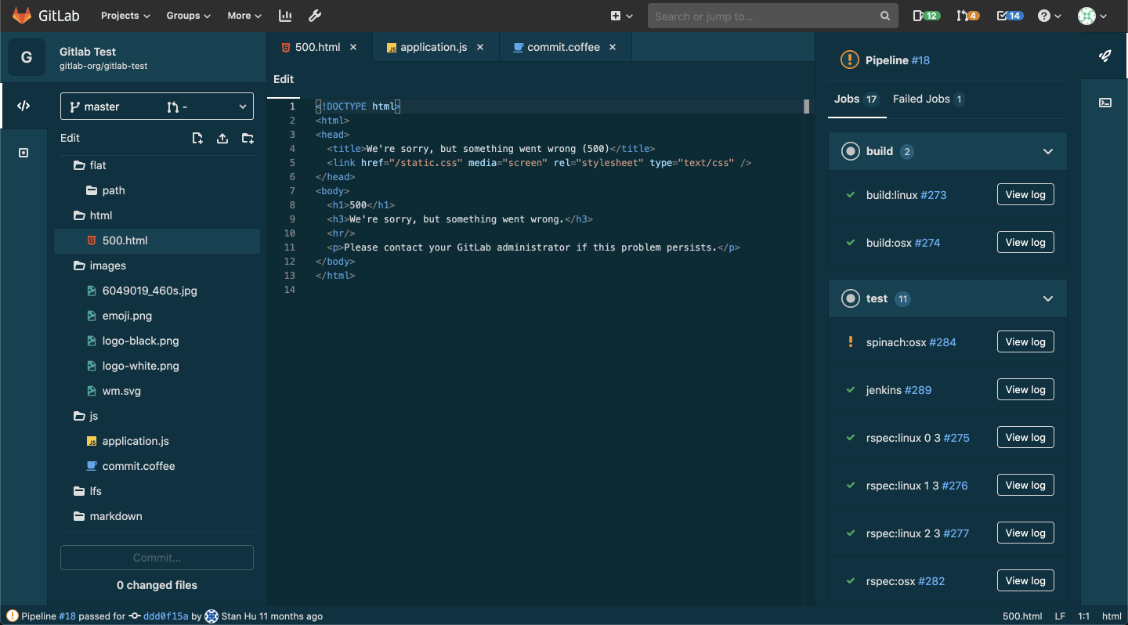
View CI job logs
You can use the Web IDE to quickly fix failing tests by opening the branch or merge request in the Web IDE and opening the logs of the failed job. You can access the status of all jobs for the most recent pipeline and job traces for the current commit by clicking the Pipelines button in the top right.
The pipeline status is also shown at all times in the status bar in the bottom left.
Switching merge requests
To switch between your authored and assigned merge requests, click the dropdown in the top of the sidebar to open a list of merge requests. You must commit or discard all your changes before switching to a different merge request.
Switching branches
To switch between branches of the current project repository, click the dropdown in the top of the sidebar to open a list of branches. You must commit or discard all your changes before switching to a different branch.
Markdown editing
- Support for pasting images introduced in GitLab 13.1.
- Side-by-side Markdown preview introduced in GitLab 14.3.
To edit Markdown files in the Web IDE:
- Go to your repository, and navigate to the Markdown page you want to edit.
- Select Open in Web IDE, and GitLab loads the page in a tab in the editor.
- Make your changes to the file. GitLab supports GitLab Flavored Markdown (GLFM).
- When your changes are complete, select Commit in the left sidebar.
- Add a commit message, select the branch you want to commit to, and select Commit.
When editing, you can upload local images by pasting them directly in the Markdown file.
The image is uploaded to the same directory and is named image.png by default.
If another file already exists with the same name, a numeric suffix is automatically
added to the filename.
There are two ways to preview Markdown content in the Web IDE:
- At the top of the file's tab, select Preview Markdown to preview the formatting
in your file. You can't edit the file in this view.
- To add more changes to the file, select Edit.
- Right-click or use the keyboard shortcut
Command/Control + Shift + Pand select Preview Markdown to toggle a live Markdown preview panel.
Live Preview
Renamed from Client Side Evaluation to Live Preview in GitLab 13.0.
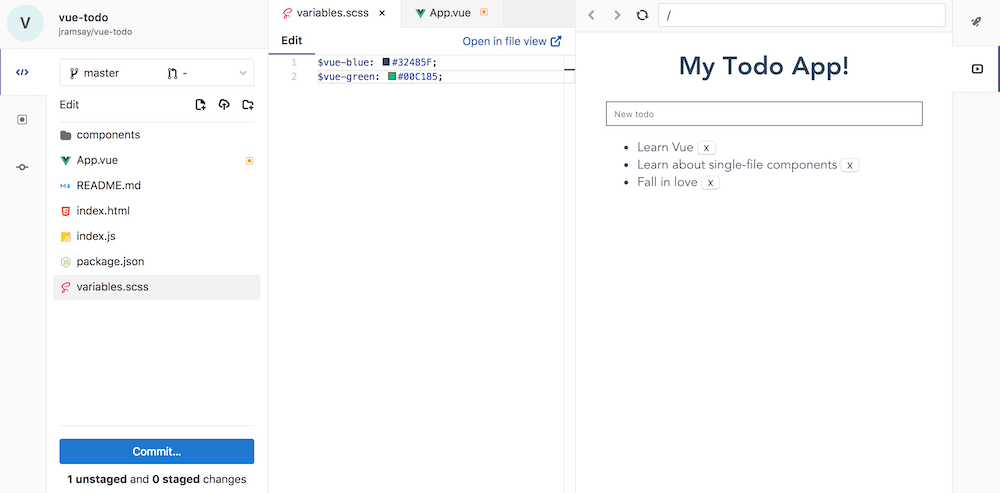
You can use the Web IDE to preview JavaScript projects right in the browser. This feature uses CodeSandbox to compile and bundle the JavaScript used to preview the web application.
Additionally, for public projects an Open in CodeSandbox button is available to transfer the contents of the project into a public CodeSandbox project to quickly share your project with others.
Enable Live Preview
With Live Preview enabled, you can preview projects with a package.json file and
a main entry point inside the Web IDE.
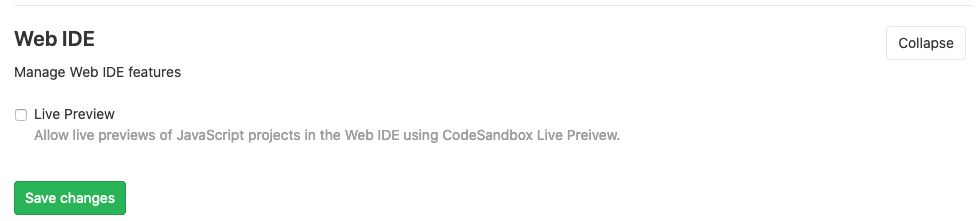
Live Preview is enabled for all projects on GitLab.com. If you are an administrator of a self-managed GitLab instance, and you want to enable Live Preview:
- On the top bar, select Menu > Admin.
- On the left sidebar, select Settings > General.
- Scroll to Web IDE and select Expand:

- Select Enable Live Preview and select Save changes.
In GitLab 12.9 and later,
third-party assets and libraries required for Live Preview are hosted at
https://sandbox-prod.gitlab-static.net when it is enabled. However, some libraries
are still served from other third-party services, which may or may not be desirable
in your environment.
An example package.json:
{
  "main": "index.js",
  "dependencies": {
    "vue": "latest"
  }
}
Interactive Web Terminals for the Web IDE
Moved from GitLab Ultimate to GitLab Free in 13.1.
WARNING: Interactive Web Terminals for the Web IDE is currently in Beta. GitLab.com shared runners do not yet support Interactive Web Terminals, so you must use your own private runner to make use of this feature.
Interactive Web Terminals give the project Maintainers user access to a terminal to interact with the runner directly from GitLab, including through the Web IDE.
Runner configuration
Some things must be configured in the runner for the interactive web terminal to work:
- The runner needs to have
[session_server]configured properly. This section requires at least asession_timeoutvalue (which defaults to 1800 seconds) and alisten_addressvalue. Ifadvertise_addressis not defined,listen_addressis used. - If you are using a reverse proxy with your GitLab instance, web terminals must be enabled.
If you have the terminal open and the job has finished with its tasks, the
terminal blocks the job from finishing for the duration configured in
[session_server].session_timeout
until you close the terminal window.
NOTE: Not all executors are supported. The File Sync feature is supported on Kubernetes runners only.
Web IDE configuration file
To enable the Web IDE terminals you must create the file
.gitlab/.gitlab-webide.yml inside the repository's root. This
file is fairly similar to the CI configuration file
syntax but with some restrictions:
- No global blocks (such as
before_scriptorafter_script) can be defined. - Only one job named
terminalcan be added to this file. - Only the keywords
image,services,tags,before_script,script, andvariablesare allowed to be used to configure the job. - To connect to the interactive terminal, the
terminaljob must be still alive and running, otherwise the terminal cannot connect to the job's session. By default thescriptkeyword has the valuesleep 60to prevent the job from ending and giving the Web IDE enough time to connect. This means that, if you override the defaultscriptvalue, you have to add a command which would keep the job running, likesleep.
In the code below there is an example of this configuration file:
terminal:
  # This can be any image that has the necessary runtime environment for your project.
  image: node:10-alpine
  before_script:
    - apk update
  script: sleep 60
  variables:
    RAILS_ENV: "test"
    NODE_ENV: "test"
After the terminal has started, the console is displayed and we could access the project repository files.
When you use the image keyword, a container with the specified image is created. If you specify an image, it has no effect. This is the case when you use the shell executor.
Important. The terminal job is branch dependent. This means that the configuration file used to trigger and configure the terminal is the one in the selected branch of the Web IDE.
If there is no configuration file in a branch, an error message is shown.
Running interactive terminals in the Web IDE
If Interactive Terminals are available for the current user, the Terminal button is visible in the right sidebar of the Web IDE. Click this button to open or close the terminal tab.
After opening, the tab shows the Start Web Terminal button. This button may be disabled if the environment is not configured correctly. If so, a status message describes the issue. Here are some reasons why Start Web Terminal may be disabled:
-
.gitlab/.gitlab-webide.ymldoes not exist or is set up incorrectly. - No active private runners are available for the project.
If active, clicking the Start Web Terminal button loads the terminal view and start connecting to the runner's terminal. At any time, the Terminal tab can be closed and reopened and the state of the terminal is not affected.
When the terminal is started and is successfully connected to the runner, then the runner's shell prompt appears in the terminal. From here, you can enter commands executed in the runner's environment. This is similar to running commands in a local terminal or through SSH.
While the terminal is running, it can be stopped by clicking Stop Terminal. This disconnects the terminal and stops the runner's terminal job. From here, click Restart Terminal to start a new terminal session.
File syncing to web terminal
- Introduced in GitLab 12.0.
- Moved from GitLab Ultimate to GitLab Free in 13.1.
File changes in the Web IDE can be synced to a running web terminal. This enables users to test their code changes in a preconfigured terminal environment.
NOTE: Only file changes in the Web IDE are synced to the terminal. Changes made in the terminal are not synced to the Web IDE. This feature is only available for Kubernetes runners.
To enable file syncing to the web terminal, the .gitlab/.gitlab-webide.yml
file needs to have a webide-file-sync service configured. Here is an example
configuration for a Node JS project which uses this service:
terminal:
  # This can be any image that has the necessary runtime environment for your project.
  image:
    name: node:10-alpine
  services:
    - name: registry.gitlab.com/gitlab-org/webide-file-sync:latest
      alias: webide-file-sync
      entrypoint: ["/bin/sh"]
      command: ["-c", "sleep 5 && ./webide-file-sync -project-dir $CI_PROJECT_DIR"]
      ports:
        # The `webide-file-sync` executable defaults to port 3000.
- number: 3000- The
webide-file-syncexecutable must start after the project directory is available. This is why we must addsleep 5to thecommand. See this issue for more information. -
$CI_PROJECT_DIRis a predefined CI/CD variable for GitLab Runners. This is where your project's repository resides.
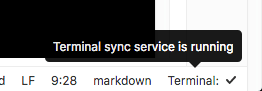
After you have configured the web terminal for file syncing, then when the web terminal is started, a Terminal status is visible in the status bar.
Changes made to your files via the Web IDE sync to the running terminal when:
- Control + S (or Command + S on Mac) is pressed while editing a file.
- You select any area outside the file editor after editing a file.
- A file or folder is created, deleted, or renamed.
Limitations
The Web IDE has a few limitations:
-
Interactive Terminals is in a beta phase and continues to be improved in upcoming releases. In the meantime, the user is limited to having only one active terminal at a time.
-
LFS files can be rendered and displayed but they cannot be updated and committed using the Web IDE. If an LFS file is modified and pushed to the repository, the LFS pointer in the repository is overwritten with the modified LFS file content.
Troubleshooting
- If the terminal's text is gray and unresponsive, then the terminal has stopped and it can no longer be used. A stopped terminal can be restarted by clicking Restart Terminal.
- If the terminal displays Connection Failure, then the terminal could not connect to the runner. Please try to stop and restart the terminal. If the problem persists, double check your runner configuration.